
In 2000, a company called Human Eyes was founded. Based in New York with headquarters in Jerusalem, Israel, the company is a veteran of 3D and animated content creation with over 70 patents to its credits. Back in January of 2016, Human Eyes announced the Vuze camera, the first affordable consumer 3D 360 camera for consumers. Fast forward to 2018, and now we have its successor, the Vuze+. In my opinion, it’s the best 3D 360 Camera 2022 has to offer.
[sc name=”amazon”]B07968K3GJ[/sc]
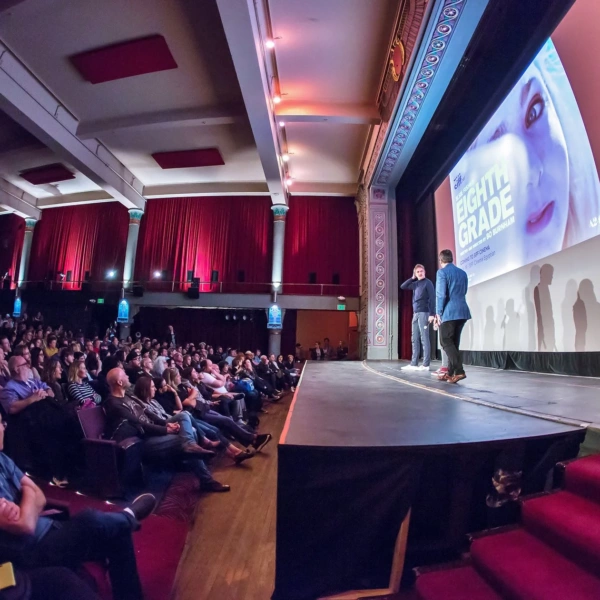
The Vuze+ elevates the camera into the Prosumer category with some pretty nifty new pro features. Plus, let’s not forget that this camera went to space! European Space Agency astronaut Paolo Nespoli took the Vuze VR Camera to the International Space Station and came back with some pretty spectacular 3D 360 footage.
Creating an easy to use 3D 360 camera that makes good 3D stereoscopic images is no easy task, even in 2022. But 3D is in high demand now since Virtual Reality has become a worldwide sensation. The Oculus Rift, HTC Vive and now the highly affordable Oculus Go, along with many others have increased the demand.
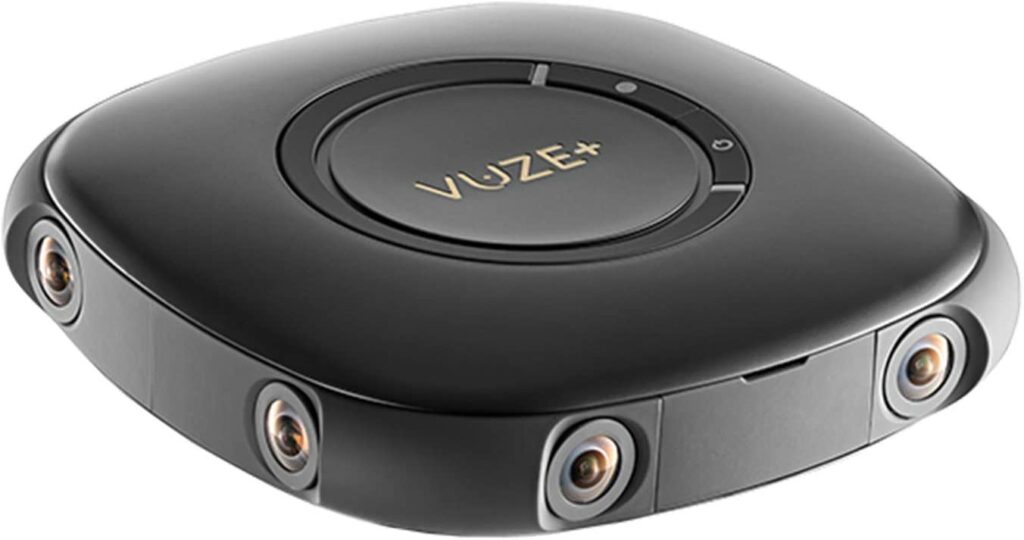
The Vuze+ has eight F/2.4 lenses packaged into the camera, using the lenses in four stereoscopic pairs giving you 3D stereoscopic 360 in 4K or 2K resolution. You have a choice of either 80 or 120Mbits/sec recording to a single MicroSD card.
On the technical side, the Vuze+ uses 8 Sony Exmor RS IMX408 CMOS sensors. This 1/3.61-inch size offers a 2.2-megapixel resolution giving you Full HD from each lens.
For audio, the Vuze+ gives you four microphones and the ability to record spatial audio.
They are a GPS accelerometer, gyroscope, and compass in the camera. The built-in battery gives you a healthy 2 hours of recording time. You can use up to a 256GB MicroSD card.
The IP65 splash proof rating means that the camera is weather resistant, but I wouldn’t jump in the pool with it. But I did get caught in the rain and had no problems.
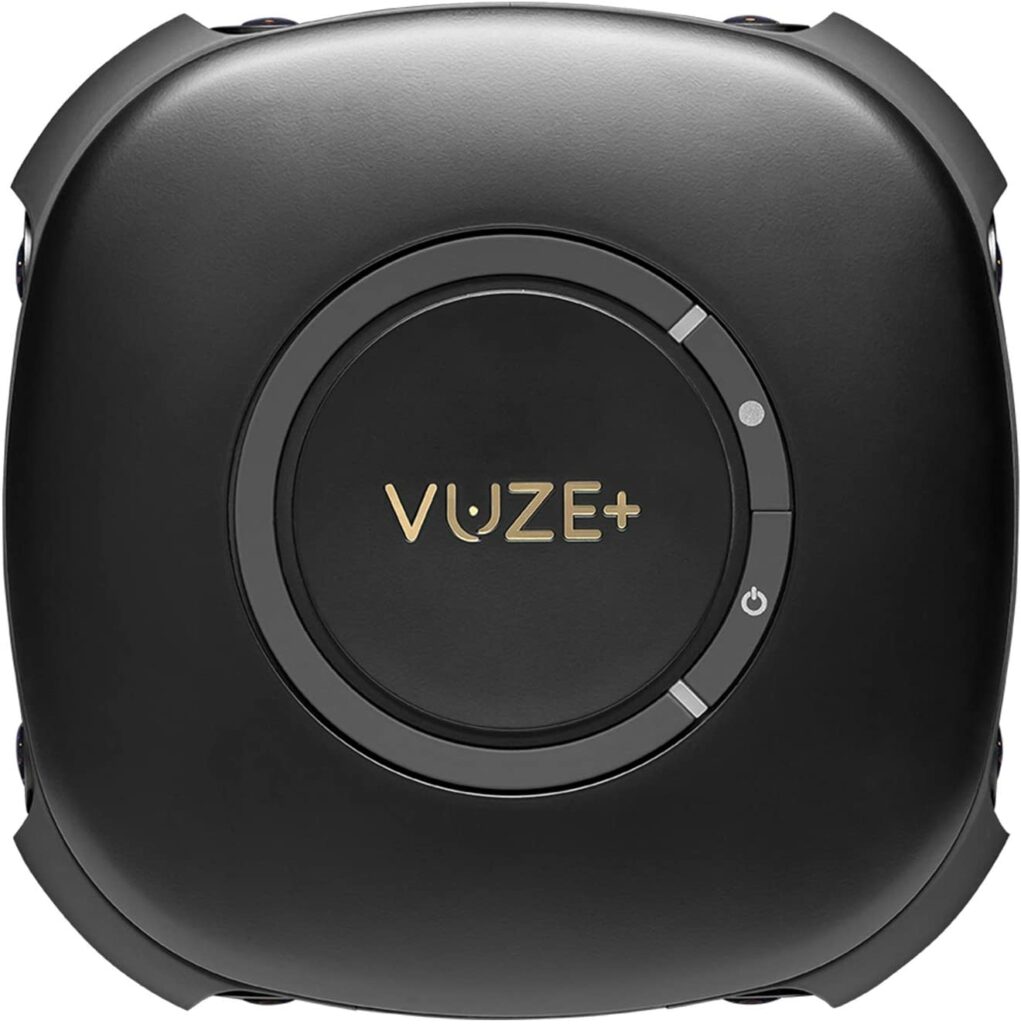
The Vuze+ makes excellent use of the two lights on the top of the camera to tell you what’s going on. Video mode, Photo mode, Live Streaming mode, even critical errors, high temp and low memory or low battery are all indicated by a quick look at these indicators. This is an excellent and intelligent way to keep you informed at a glance about your Vuze+ 3D 360 Camera conditions in 2022.
What Are The Differences Between The Original Vuze And The New Vuze+?
- First, you get manual exposure enabling you to select the ISO from 100 to 1600 and adjust the shutter speed between 1/60th to 1/1000 in one stop increments. I would advise caution in making too many adjustments here as you will after the blending of the exposure in the final 360 video or photo.
- Second, with Parallax to consider, (the difference between the physical placement of the two lenses)keeping the camera level is very important for good 3D stereoscopic. So Vuze+ gives you a Horizontal level sensor. It appears in the Vuze App.
- Third, Exposure compensation can now be controlled +/- 2EV in 1/3 stop increments. These are not global adjustments but are able to be set for each pair of lenses.
- Four, You get a 60fps setting if you are shooting in the 4K 2D setting. This is the only consumer 360 camera to offer this feature.
- Five, Real Photos. In the original Vuze, you took a short video and did a frame grab to get stills. Now you get a real photo mode, and it works great!
- Six, the Preview mode in the App displays each lens view. You can switch to see the next view, but you don’t get to see a full 360 view on the display.
- Seven, the stitching software, called Human Eyes VR Studio has improved it’s stitching with Refine Stitching and Calibration. These tools allow you to fine-tune your stitch to get a perfect render in 3D 360. Also, you get the Horizontal Stabilization Tool to straighten your horizon when needed.
- And Eight, which is the most significant improvement in the camera, is the ability to live stream with the Vuze+. You can get up to 4K quality depending upon your internet connection. Plus add to that the Refine Stitching feature and you’ve got quite a good 3D 360 capable VR Live Stream beauty.
So those are the highlights, now let’s dig in and examine the build quality, video quality, stitching quality and the app functionality.
Build Quality Of The Vuze+ 3D 360 Camera of 2022
The build is solid, weighing in at 450grams, it’s neither the lightest or the heaviest 3D 360 camera out there. Due to the eight lenses required for the 3D 360, it is bigger than most other 2D 360 cameras but smaller than the other 3D 360 camera options in 2022 currently on the market. As shown in the Nat Geo documentary, One Strange Rock, the camera can be helmet mounted, but it may give you a bit of a neck ache if you carried around on your head all day.
Like all 360 cameras, the lenses are pretty exposed because they have to be since they are full fisheye lenses. The case that comes with the Vuze+ is very nice but will not go around the camera once you mount it on a monopod for shooting.
App Functionality
The initial setup is very straightforward. Once you download and install the app for your iOS or Android phone, just turn on your Vuze+ and also turn on the wifi button behind the access flap.
The App will prompt you to connect to the camera. Click “Connect,” and a list of nearby wifi devices appear, click on your Vuze+ camera and boom, that’s it. It offers a very quick connection and glitch-free process. I liked that very much.
The first screen that you see is a preview screen. By clicking the arrow on either the right or the left, you can change the view to the adjacent camera view. I do wish that I could see a full 360 view, even if it didn’t do a full stitch. But maybe in a future upgrade.
At the top of the display, you will see the Camera Level Indicator. If you select this, the display will open up fuller on the screen, and you can adjust your camera if need be.
Completing the display across the top is your frame rate, memory card percentage free and battery level.
Down at the bottom of the screen, we find the shot timer which works for both video and still pictures giving you a choice of off, 5seconds, 10 seconds, or 20 seconds. This is a great feature and lets you get ready by displaying a countdown timer before firing off the still image or starting the video recording.
Just across from that you see an “eye” which toggles off and on the preview display. To the right of that is your exposure compensation. The display then switches to show all four lens images. A red outline lets you choose which lens that you want to adjust. There is a center “link” or “unlink” switch, but I did not see it working for either video or still images. But you can go to each camera to make the adjustments that you want. Truthfully, while shooting, I never used the feature because I fear that you may have trouble with blending when you stitch the images together.
In the upper left, you’ll see three bars which give you access to another menu letting you choose “Gallery” or “Settings.”.
I would advise going into settings and selecting the “WiFi Enable on Boot.” This is a nice feature that turns on the WiFi connection when you power up the camera which makes it easier since you don’t have to open the access flap and press the tiny button.
In the “Record Settings” I leave the 120 Mbps, and 3D 30fps set.
There are a whole bunch of settings for you to experiment with but the most useful ones that I found were the “Format Memory Card.” and the “Check for Firmware Update.”. You can also access the camera user manual from the app.
Overall score for the Vuze+ App- “A.”
Human Eyes VR Studio
When you launch the software program after installing you will need to go through the activation process.
Open the software, and you will be guided through the setup procedure in only three simple steps.
Once that’s completed you are ready to go.
Pull the MicroSD from your Vuze+ camera and put it into your computer via a MicroSD Card Reader or you can connect the camera via the USB cable. Be sure that USB Streaming is off in the settings.
- Import to Preview and edit
- Preview or edit projects or media that you have already imported.
- Render any media or project for viewing and sharing.
- You have a checkbox also for “Remember this for the next time.”
If you Render and Share you skip the adjustments available to you and go straight to the render screen.
If you Import and Edit, the first step is to select either some or all of the clips from the MicroSD Card. The next step is to choose the location to store your files. Once the file(s) are imported, they will appear to the right under recent media and the Imports tab.
Moving forward, select a clip to “Preview and edit” and it will open in the “Preview & Edit” window.
On the left side of the software are controls for flipping your image
The next icon down lets you drag the image to the center of what you wish to view when you first see the image in 360.
The next icon has the ability to let you crop your image from 360 all the way down to Zero if you like. But the most powerful part of this feature is to make 180 VR videos or stills from your 360 footage. Using this tool in combination with the Drag Image to center tool gives you tremendous control over your final image.
The Edit Patch icon is next down the column, and when you open it you can use the preset of no image on the top (Zenith) and the Human Eyes logo at the bottom (Nadir). Other options include adjusting the image that you wish to use, leaving you open to make your own if you like, and to alter the size of the image. You can also make no image and just blur the area if you wish to. The Vuze+ does a pretty good job with the Zenith area, but the bottom will need some help to get rid of the monopod. Personally, I like to paint this out in Premiere or After Effects in the video edit process.
The next icon down the list is the Horizon Stabilizer. This control is great if you shoot something off-kilter and want to fix your horizon.
The last control is certainly the most powerful and offers you the ability to both stitch, blend and color in your image.
You will notice across the top of the image the numbers, 1,2,3,& 4. These correspond to the camera sets. If you need to adjust the seam lines, you can, “Add a Current Frame” and then the software will attempt to fix the stitching issue. If it is not completely right, then you have the ability to alter the position of the top, bottom or all fours of the camera sets and to toggle on and off the “Projective Perspective Correction”.
To aid you with these adjustments, at the bottom left you can choose which image you want to see. Your choices are Only the left lens, Only the Right Lens, and Stereo in Top/Bottom view.
Also, you can tweak the Blending, Color Matching, Levels and the Calibration.
Two other very useful tools are the Zoom tool and the Frame Grab Tool.
The Zoom tool is very helpful when you are Refining the Stitching.
When doing your adjustments be sure to toggle between the Left and right eye to make sure that they both look good.
When you have your image to your liking the last step is to render the image. Here again, Human Eyes VR Studio gives you some options and some presets.
With the presets you start off with custom, but you also have YouTube, Facebook, Vimeo, and the Zone, a platform designed by Human Eyes especially for Vuze videos. This is not a free platform.
In the Advanced options, you can change your render to ProRes instead of the standard H.264. Adjustments for Video Bitrate, Stitching method, with an Adaptive (beta) mode, Audio choices of Stereo and Spatial Audio as well as being able to render as Equirectangular or Cube Map.
Overall, the software is fairly user-friendly. Human Eyes has been very good at listening to its users, and I have seen the evidence with the upgrades to the software so far. Plus I understand there will be more upgrades coming down the line.
I would rate the software at a solid “B” simply because it lacks any optical stitching or D-Warp options at this time. But if you are aware of your framing when you shoot you can get excellent results.
360 Live Streaming: The Best 3D 360 Camera Software Of 2022

The first thing that you will need to do is to connect to the App and turn on “USB Streaming” in the App to make the camera active for 360 Live Streaming. But BEWARE, if you leave this on, the camera will not be recognized when you plug in and try to use the Human Eyes VR Studio to import directly from the camera. So turn it on when you need it and then turn it off when you are using the camera for recording 360 video or stills.
Next, you can leave the camera on and connect a USB cable from the camera to the computer that you want to use for doing your 360 Live Streaming. You will know when you are properly connected with the camera when you see a purple light instead of the usual blue light on the top display.
A popup window comes up and prompts you to continue and activate the Live Streaming software. The camera is recognized, and your initial screen comes up showing you a live stream preview in the center.
On the left you have the Camera info and settings. Along with the Camera ID, Firmware Version, and Battery level choices for Camera Sound, Anti-Flicker Settings, Exposure Mode, Exposure Settings and Exposure Compensation.
The right side of the screen contains your Settings for Live Streaming. A toggle switch for turning on your Broadcast Media and selecting either Custom RTMP, YouTube or Facebook.
If you choose YouTube or Facebook, a prompt below them offers you a connection to the appropriate website to let you set up your live stream particulars there.
You can choose to Save Local Copy of your stream in either Stitched or Unstitched formats and lets you decide what folder on your computer to save the file to.
At the bottom of the column are the Video Settings. Offering choices of 2D or 3D, and if 2D using the right eye or left eye view. When 3D is chosen you see a top/bottom display in the Preview window. I usually don’t set this for 3D until I check my stitch, making adjustments if needed. Also toggling the 2D right or left eye is an excellent way to check the stitch on each eye. Resolution can be set for 2K or 4K along with an aspect ratio of 16:9 or 2:1. All of these settings are extremely important and depending upon the strength of your internet connections and the intended audience you have a great deal of flexibility.
Back to the preview window and the adjustments are very similar to the ones offered in the Human Eyes VR Studio.
- Options for flipping the image in case you have to mount the camera upside down.
- Choosing the center position by dragging the image where you want.
- Cut Field of View from zero to 360 lets you broadcast in any degree of view that you need to. I see this being a great way to air in 180 VR when necessary or desired.
- Edit Patch offers the now familiar Human Eyes Logo or selects any logo that you want or none at all.
These first few tools work exactly the same as in the Human Eyes VR Studio, as described earlier.
Lastly, the Advanced tools are probably the most vital. Just as in the VR Studio you can tweak your stitching with the Refine Stitching tool. I found that the automatic adjustment is correct most of the time, but if it’s not the manual controls let you decide on the exact stitch parameters. Blending works hand in hand with the stitching to create a smooth, invisible look to your seams.
Color matching, as in VR Studio as well, lets you decide if your color match is accurate or if you want to use an individual lens to achieve a desired look to your color profile.
When you have your settings to your liking and the set up completed on your platform of choice, just click the start button to begin your broadcast.
One proviso, when you are connected via the USB to your computer the camera can not charge so be sure to keep an eye on your battery level in the computer display.
This software is a definite “A+” for its intuitive design and functionality. Bravo, Human Eyes for a job well done.
The Image Quality
Here is another great feature of the best 3D 360 Camera of 2022. I like the look of the video images made with the Vuze+. The colors are accurate, and the resolution is quite good at 4K.
The still images are crisp and clean and very easy to work with. I would love to see the next version of Vuze Three offer a higher resolution than 4K.
My grade for the Image Quality is a healthy “A.”
The cumulative score for the Vuze+ is an “A.” It offers a high-quality, sturdy build with excellent features and solid ergonomics. The app is clean and comfortable to use with no connection issues.
The software is stellar, and I can’t wait to see what will come with the next upgrade. Hopefully, some form of optical flow to enhance the stitching process further.
All in all, this is The Best 3D 360 Camera for the money in 2022. Nothing else out there comes close with the low price tag.
Completing the Vuze Infrastructure Human Eyes has released a marvelous underwater housing enabling optically accurate underwater 3D 360 videos.
I should also mention that Human Eyes has their eyes on the future with the VR Horizons program, offering schools the opportunity to get these cameras at a discount and train the next generation of 360 filmmakers.